![]()
How to Charge RV Battery with Generator [2 Methods]
DISCLAIMER: AS AN AMAZON ASSOCIATE I EARN FROM QUALIFYING PURCHASES. THIS POST CONTAINS AFFILIATE LINKS THAT WILL REWARD ME MONETARILY OR OTHERWISE WHEN YOU USE THEM TO MAKE QUALIFYING PURCHASES. FOR MORE INFORMATION, PLEASE READ MY EARNINGS DISCLAIMER.
If you have a generator with a 12-volt outlet or battery charging posts, you can simply use them to charge your battery. Since the generator is NOT a 3-stage battery charger and will not cut the power once it is charged, you will have to do it manually. The best way to charge your battery from the generator is to use a 3-stage battery charger that you can plug into the 120-volt socket.
Using a generator to charge your RV batteries isn’t the best option (and definitely NOT the quietest), but it’s sometimes the only one. If you ever find yourself in a circumstance where that is your only alternative, it is perfectly safe to charge your RV’s battery with a generator if you have the right tools to do so.
Despite the fact that most generators aren’t meant to charge batteries, some models do have connectors and leads. If your generator has a 12-volt outlet, it can indeed, charge a 12-volt battery!
If they don’t have battery connectors, a 12v charging cable (paid link) could be acquired that plugs into your generator DC outlet (paid link from Amazon):

It can be used in a manner, similar to this:

![]()
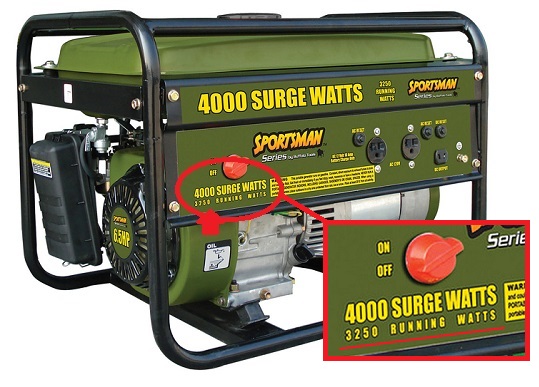
To charge your battery with a generator, you will need to have a generator with a 12V output and the appropriate cords, as well as enough time to charge it. Choosing the right generator is an important first step.
Generators have a rated output, which is the amount of power they produce. Many generators claim to have high output, but, you can normally expect them to be significantly less in terms of continuous output power:
Charging your RV battery with a generator and a battery charger, could be the fastest charging method according to the video below (seems like he tried many things):

![]()
He is using a Schumacher battery charger (paid link), which is a little different from this newer model below:

Step 1. Check the condition of your battery
Check battery connections and electrolyte levels. Dirt and moisture are poor conductors of electricity, so keeping your battery clean is essential for smooth charging.
If you find any white, green, or yellow fuzzy debris on the battery’s connectors, you must clean them thoroughly. Remove carefully any spilled acid or rust from the battery’s top.
You can either buy specifically designed cleaners or you can create a cleaning mixture yourself for free at home:
- Take some baking soda from the kitchen and combine it with water.
- Take an old brush that you no longer use (it may even be your old toothbrush) and place it into the baking soda mixture.
- Rub the brush gently over the battery contacts, and the dirt should go soon.
- It’s important to keep the battery dry before charging it, so clean it with a fresh dry towel.
If your battery is NON-sealed, you will need to inspect the battery’s electrolyte level. The vast majority of people utilize factory-sealed batteries, so if you have one, there is no need to fill it with water.
For NON-sealed batteries, a correct water level is required to avoid problems. If the level falls below the specified level, the plates of your RV’s battery will be exposed to air and will get eventually damaged, while reducing its total lifespan.
If you discover a low level of electrolyte in your battery, add some distilled water to top it out. Pour the water in slowly until the mixture reaches the fill line.
After that, carefully connect the battery’s lid and other components. Do NOT rush this process in order not to cause an overflow.
Step 2. Check the condition of your generator
According to the manufacturer’s instructions, check the oil level in the generator. Make sure that the gas tank is full and if it’s a battery-powered generator, it needs to be fully charged.
Allow the generator to warm up before using it.
Step 3. Unplug all the loads from your generator
You don’t want to have anything extra to be draining power while charging and this is usually part of the manufacturer’s instructions for generator utilization.
Step 4a. Connect the battery to the battery charger
If you are using a battery charger, connect the alligator clips on it to the battery terminals. Red charger clip to the battery’s positive terminal (+). Black clip to the battery’s negative terminal (-).
On the battery adjacent to the terminal, a plus symbol (+) indicates the positive terminal, while a minus sign (-) indicates the negative terminal. Make sure you are using a good three-stage battery charger to charge your batteries in order to avoid overboiling them.
A good three-stage charger (paid link) just like in the picture below, will include a battery charger, battery maintainer, a trickle charger, and a battery disulfator:

Step 5. Connect the battery charger to the generator
Connect the battery charger to the 120-volt outlet on the generator. Examine the battery charger’s charging condition light to make sure it’s on.
The battery charger’s instructions should give you a clear explanation of the lights or gauges that indicate the charger’s status. Periodically check the liquid level in the deep cycle battery (NOT sealed) and add distilled water as needed.
Allowing the liquid level to fall below the top of the battery plates can cause it to overheat and get damaged.
Alternative Step 4b. Connect the battery to a 12v generator outlet
If your generator comes with a 12VDC power outlet, you can use it to charge your battery. Only big warning! Since this is NOT a three-stage charger, you will need to watch your battery’s charging level and remove it promptly as soon as it is full!
Three-stage battery chargers are a bit safer to use and are less problematic if you cannot watch your charging levels all the time. The charging can take a few hours depending on the battery’s current discharge level, and it’s typical for the battery to not reach 100 percent with this method.
As you see, it’s not impossible to charge your RV home batteries with a generator and there are several ways to do it. Just make sure to get the right gadgets and you are good to go!

Click on the white button above to find your electrician!

Our Team

Legal Disclaimer